Raspberry Piで学ぶ電子工作でオソヨーのLCDを使ってみました。
「カラー図解 最新 Raspberry Piで学ぶ電子工作 作って動かしてしくみがわかる (ブルーバックス)」の内容を試しています。
Raspberry Pi 3 Model B+を使っています。
書籍で推奨されているパーツセットは秋月通商の「Raspberry Piで学ぶ電子工作 パーツセット」ですが、アマゾンの「Raspberry Piで学ぶ電子工作 専用 実験キット 基本部品セット スターターパック (電子部品関連)」を注文しました。
スポンサーリンク
レビューや商品説明にも記載されてますが、このセットでは、温度センサとLCDパネルが書籍のものと異なります。
Raspberry Piで学ぶ電子工作用セットということで販売されていますが、販売者が無断でそういっているだけなので、サポート対象外です。
温度センサーに関してはこちらです。
→Raspberry Piで学ぶ電子工作用セットのDS18B20の使い方
配線は単純です。
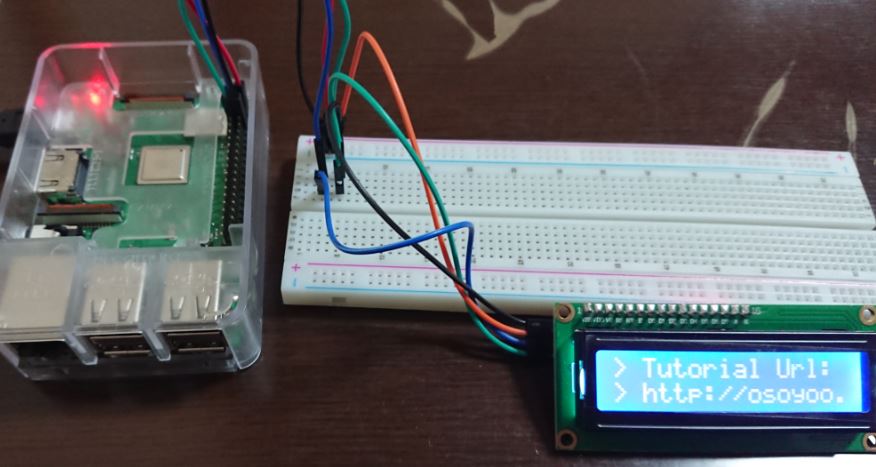
販売者のオソヨー(osoyoo)のサポートページに書いてあるとおりにやってみました。
http://osoyoo.com/2016/06/01/drive-i2c-lcd-screen-with-raspberry-pi/
まずは、I2Cを有効にします。
→Raspberry Piの設定をターミナルで変更しました。
GUIでも設定変更できます。
ターミナルで以下のコマンドを入力します。
以下の記述がない場合は、追記して保存します。
i2c-dev
次に、smbus and i2c python libraryをインストールします。
sudo apt-get install -y python-smbus i2c-tools
そして、再起動します。
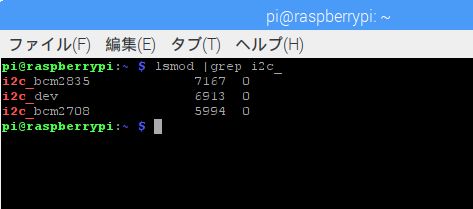
次は、
と入力します。
「i2c_bcm2708」があればOKです。
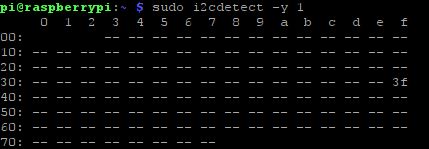
「sudo i2cdetect -y 1」または、「sudo i2cdetect -y 0」と入力します。
どちらかが成功すればよいです。
成功すると次のように表示されます。
この場合、「3f」がLCDのアドレスとなっています。
http://osoyoo.com/driver/i2clcdb.py
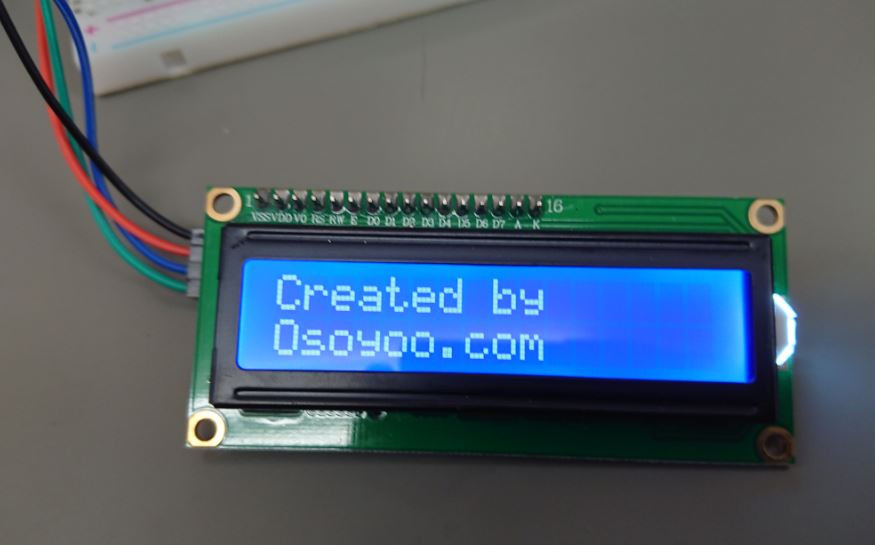
こちらのコードをコピペして、背面の可変抵抗をドライバーで少し調節したら文字が表示されました。
コードがリング切れにならないように、実際に動作確認できたコードをコピーして以下に引用しておきました。
# _____ _____ _____ __ __ _____ _____
#|     |   __|     |  |  |     |     |
#|  |  |__   |  |  |_   _|  |  |  |  |
#|_____|_____|_____| |_| |_____|_____|
#
# Project Tutorial Url:http://osoyoo.com/?p=1031
#
import smbus
import time

# Define some device parameters
I2C_ADDR  = 0x3f # I2C device address, if any error, change this address to 0x27
LCD_WIDTH = 16   # Maximum characters per line

# Define some device constants
LCD_CHR = 1 # Mode - Sending data
LCD_CMD = 0 # Mode - Sending command

LCD_LINE_1 = 0x80 # LCD RAM address for the 1st line
LCD_LINE_2 = 0xC0 # LCD RAM address for the 2nd line
LCD_LINE_3 = 0x94 # LCD RAM address for the 3rd line
LCD_LINE_4 = 0xD4 # LCD RAM address for the 4th line

LCD_BACKLIGHT  = 0x08  # On
#LCD_BACKLIGHT = 0x00  # Off

ENABLE = 0b00000100 # Enable bit

# Timing constants
E_PULSE = 0.0005
E_DELAY = 0.0005

#Open I2C interface
#bus = smbus.SMBus(0)  # Rev 1 Pi uses 0
bus = smbus.SMBus(1) # Rev 2 Pi uses 1

def lcd_init():
  # Initialise display
  lcd_byte(0x33,LCD_CMD) # 110011 Initialise
  lcd_byte(0x32,LCD_CMD) # 110010 Initialise
  lcd_byte(0x06,LCD_CMD) # 000110 Cursor move direction
  lcd_byte(0x0C,LCD_CMD) # 001100 Display On,Cursor Off, Blink Off
  lcd_byte(0x28,LCD_CMD) # 101000 Data length, number of lines, font size
  lcd_byte(0x01,LCD_CMD) # 000001 Clear display
  time.sleep(E_DELAY)

def lcd_byte(bits, mode):
  # Send byte to data pins
  # bits = the data
  # mode = 1 for data
  #        0 for command

  bits_high = mode | (bits & 0xF0) | LCD_BACKLIGHT
  bits_low = mode | ((bits<<4) & 0xF0) | LCD_BACKLIGHT

  # High bits
  bus.write_byte(I2C_ADDR, bits_high)
  lcd_toggle_enable(bits_high)

  # Low bits
  bus.write_byte(I2C_ADDR, bits_low)
  lcd_toggle_enable(bits_low)

def lcd_toggle_enable(bits):
  # Toggle enable
  time.sleep(E_DELAY)
  bus.write_byte(I2C_ADDR, (bits | ENABLE))
  time.sleep(E_PULSE)
  bus.write_byte(I2C_ADDR,(bits & ~ENABLE))
  time.sleep(E_DELAY)

def lcd_string(message,line):
  # Send string to display

  message = message.ljust(LCD_WIDTH," ")

  lcd_byte(line, LCD_CMD)

  for i in range(LCD_WIDTH):
    lcd_byte(ord(message[i]),LCD_CHR)

def main():
  # Main program block

  # Initialise display
  lcd_init()

  while True:

    # Send some test
    lcd_string("Created by         <",LCD_LINE_1)
    lcd_string("Osoyoo.com        <",LCD_LINE_2)

    time.sleep(3)

    # Send some more text
    lcd_string("> Tutorial Url:",LCD_LINE_1)
    lcd_string("> http://osoyoo.com",LCD_LINE_2)

    time.sleep(3)

if __name__ == '__main__':

  try:
    main()
  except KeyboardInterrupt:
    pass
  finally:
    lcd_byte(0x01, LCD_CMD)
動かしてみたら、次の画像のようになりました。